For over a decade, Photoshop Elements has made it very easy for non-professional users to master imaging magic. For the 2022 version, we have a home screen, additional Guided Edits, and automatic Al-generated creations. With the Expert mode, those having experience with photo editing will find all the necessary tools required for greater control.
Generally, the Adobe Photoshop Elements is a good system that manages the users’ photos utilizing the Elements Organizer. However, there are issues when trying to import from mobile devices. There are few devices supported for a direct import, however, users can simply copy their files to their PC to avoid this issue with the Adobe Photo Downloader. Asides this issue, this is an excellent program!
User Reviews
There are no reviews yet. Be the first one to write one.
**Official website : http://www.adobe.com/Photoshop-Elements
Photoshop Elements and Photoshop CC: What’s the difference?
Photoshop CC is a program designed for professional image editing while Photoshop Elements, on the other hand, is meant for home users and casual photographers who just want to edit and share their pictures with family and friends.
The tools present in both Photoshop CC and Photoshop Elements are very similar; however, in Photoshop CC, these tools are made very accessible. Also, complex editing options are available in the Photoshop CC but provide less guidance on how to use them.
Getting the Adobe Photoshop Elements
The Adobe Photoshop Elements can be purchased alone for $99.99 or along with its enthusiast-level video-editing companion for $149.99. You can download the 30-day trial version as well. The installer takes about 2.5GB, while the installed program takes about 2.5 GB so it is advised that when downloading, your PC’s disk must have enough space.
This software works on Windows 7, 8, and 10 and the Apple macOS versions 10.11 through to 10.13. Also, note that the Apple QuickTime is no longer required by Elements.
How to Download and Set up the Adobe Photoshop Elements
Step 1: Visit https://helpx.adobe.com/download-install/kb/photoshop-elements-downloads.html, then at the top select the latest version and pick the right operating system.
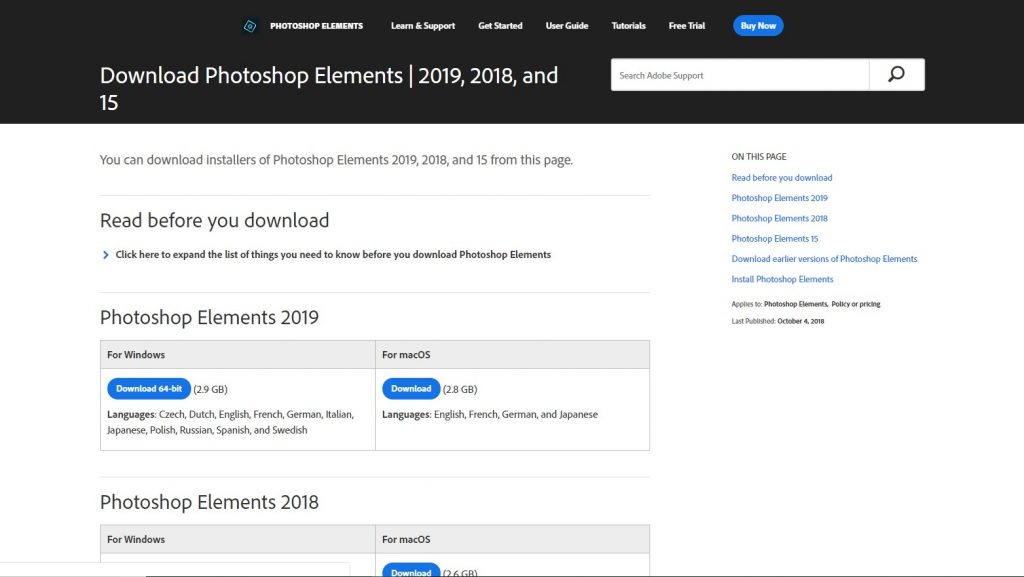
Step 2: Click the download button and save it in your preferred location.
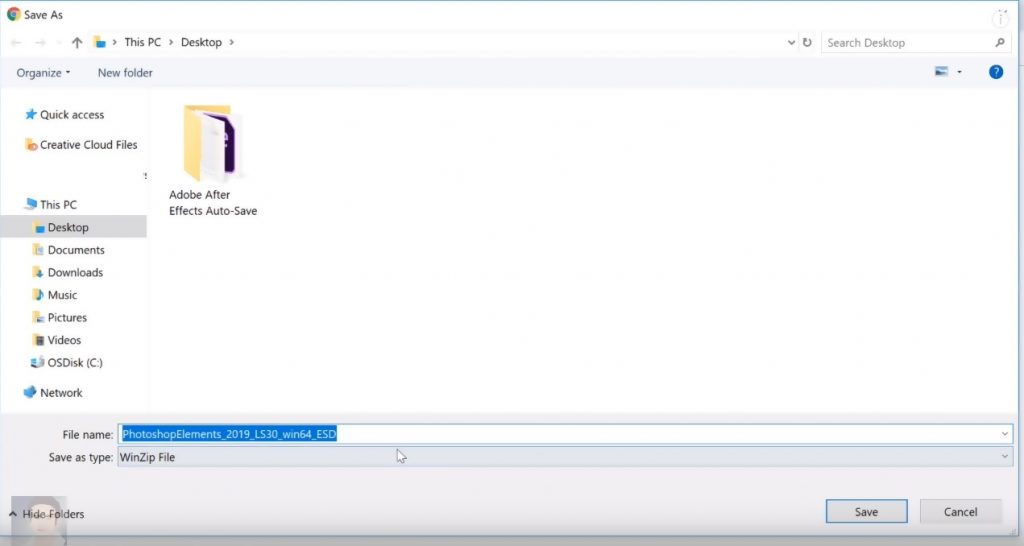
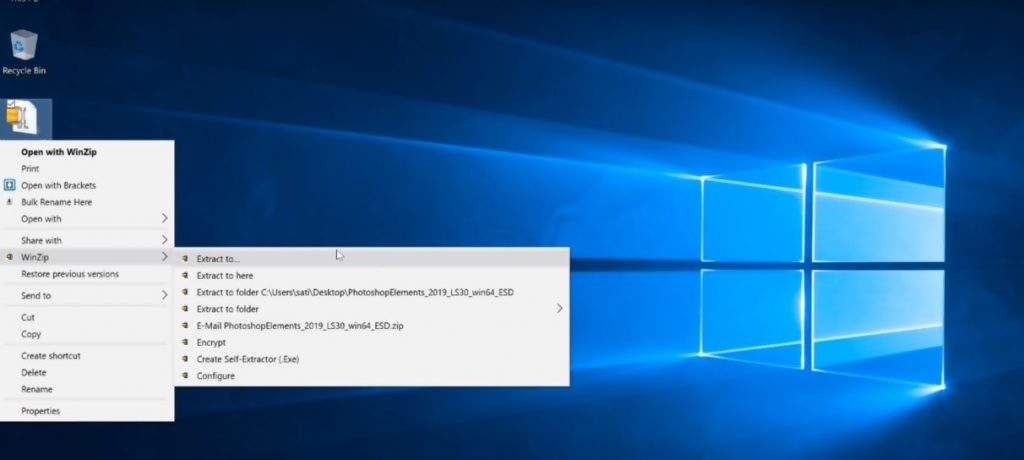
Step 3: You then need to unzip the folder containing your download
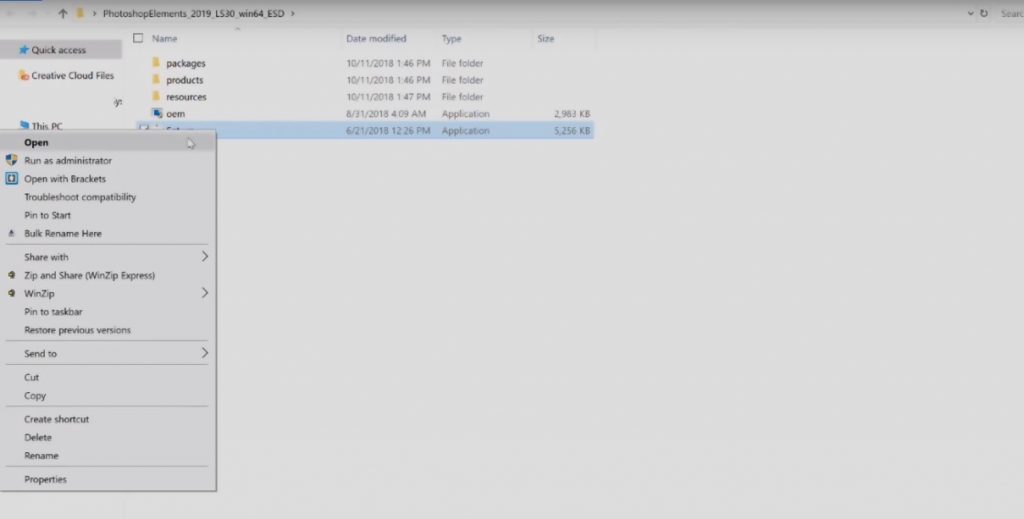
Step 4: After unzipping the folder, select the file and run as administrator
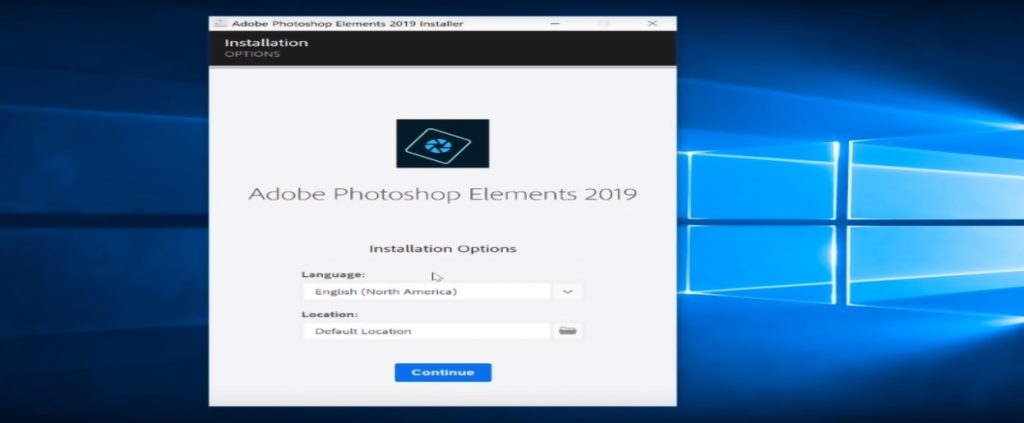
Step 5: Pick your preferred language as well as your location then click “continue”
Then the installation begins
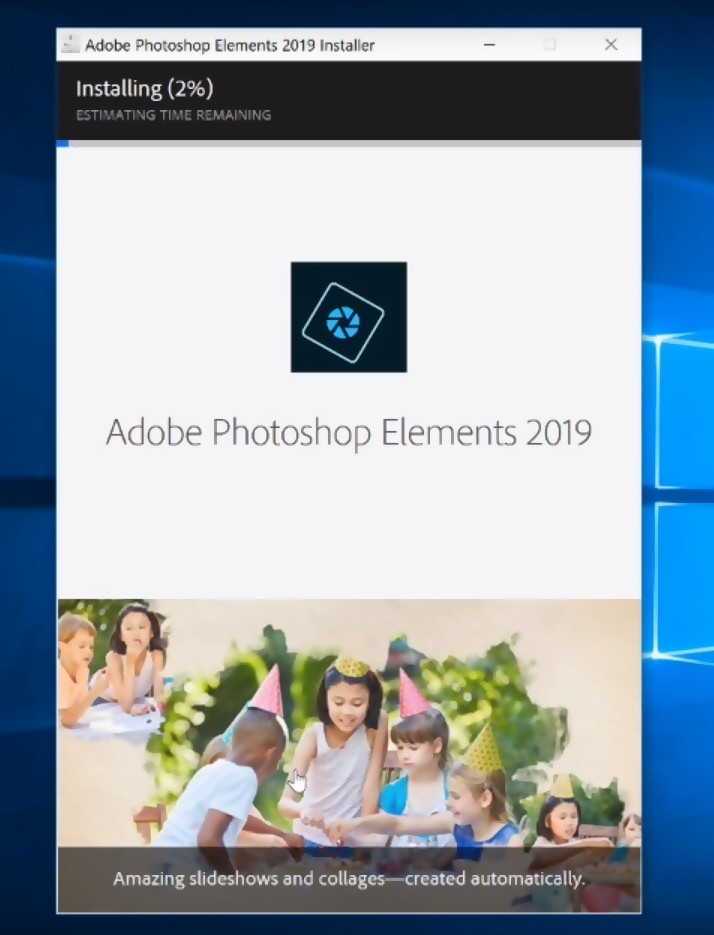
Step 6: After the installation is 100% complete, you click finish
Pros and Cons of the Adobe Photoshop Element
Adobe Photoshop Element comes with different features to fulfill users’ needs. However, it also comes with a few issues. The following gives you the pros and cons of this software.
Pros:
- Easy to use
- Powerful Photoshop tool
- The inclusion of guided edits are great
- Lots of automated features
- Quick to install and use
Cons:
- Not everyone will like the automated effects
- Steep asking price
- Striking new features are absent
- Some popular social networks are not supported
Advantages of Adobe Photoshop Element
Image Import media Tools pro
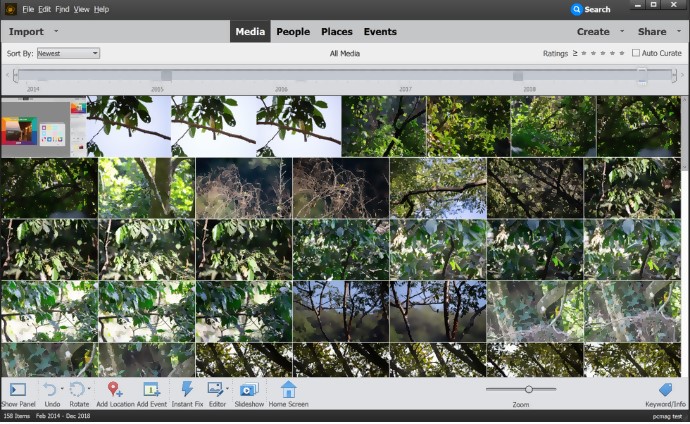
Now the installation is complete and you can now import photos and videos. This can be achieved either by importing in bulk or importing from your card reader or camera.
Importing in Bulk
With bulk import, you can quickly import videos and photos from your computer to the Elements Organizer. This can be done in two ways: Either by importing them all at once or checking what folders contains them and then you can select whichever one you’ll love to import. Follow these steps:
- Check the Organizer workspace and then click “Import” and then “In Bulk”
- From the Import Media dialog box, pick the folder that contains your media. Incase this folder is not listed, choose “Add Folder” and then search for the folder you wish to import photos from.
- Next, pick the subfolders containing the videos and photos you want to work on and then click “Import”.
Importing from your card reader or camera
You can easily import media files from your card reader or camera directly to the Elements Organizer
- Connect your card reader or camera to your PC
- Then click on import from camera or card reader
- Then in the dialog box of your Photo Downloader, select where you want to import or copy from.
- Click Get Media
Adjusting Photos
Resizing or repositioning of photos
To adjust both the photo and frame, click the desired photo once, and when adjusting a photo within a frame, you double click the photo.
You can also try any of these:
- For photo repositioning, click somewhere around the bounding box and then drag the photo.
- For photo resizing, drag the slider that pops up above the image you’ve selected. You can also place the Move tool over a top, bottom, corner, or side; as soon as the diagonal double-headed arrow pops up, drag it.
- After resizing or repositioning the photo within the frame, Click “Commit” or “Cancel” when you’re through.
Rotating Photos during a Photo project
To rotate both the photo and frame at the same time, click the selected photo once. Double-clicking the photo means you want to rotate this photo within a frame. You can also try any of these:
- Click somewhere around the bounding box, and you’ll notice a circle appear below the selection. Now place the cursor above this circle. Immediately the curved four-headed arrows become visible, rotate the image by dragging the handle of the trackball.
- Also, you can double-click the photo and then select the rotate button (this can only rotate in increments of 90 degrees).
- Another way is to place the Move tool above a corner, and then drag the double-headed arrow (curved shape) that appears; this will rotate the photo.
Fixing Faces
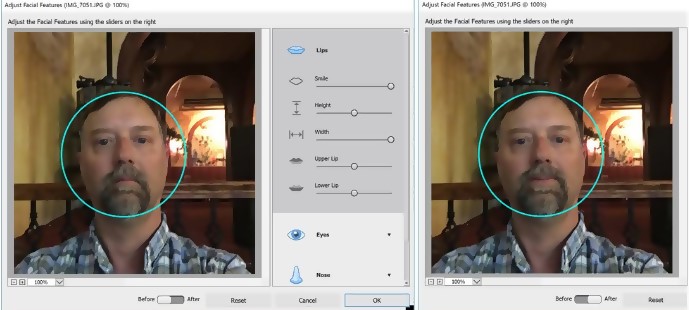
To identify as well as adjust people’s facial characteristics in a photo, the face-aware technology is used. Portrait pictures can be taken and facial features like nose, jaw, eyes, and lips can be adjusted by making use of simple sliders to decrease or increase an effect.
-
Removal of Red Eye
Red-eye is one common problem that occurs when the retina of the subject is illuminated by the flash of your camera. This often happens when pictures are taken in a dark room with this subject’s iris widely open. You can make use of the red-eye reduction feature of your camera, if available.
With Adobe Photoshop Elements, you can fix red-eye automatically; just import the affected photo, then from your Get Photos dialog box, click on “Automatically Fix Red Eyes”. Red eyes can also be removed from the photo in the “Photo Browser”
-
Removing the Pet Eye Effect
The Adobe Photoshop Elements makes it possible for you to clear off the reddish glow in the eyes as a result of light reflection (i.e. the use of flash or low ambient light). In the case of animals, the eyes glow red, green, white or yellow and the normal red-eye removal tool may not solve this situation properly.
-
Open Closed Eyes
This feature is enhanced in Adobe Photoshop 2022, which helps you open closed eyes in photos. This is possible by making use of the eyes from a different photo either from the Elements Organizer catalog or from your computer.
-
Removing Spots and unwanted objects
The Adobe Photoshop Elements has different tools that clear off little flaws like unwanted objects or spots from your photos or images. This is made possible by using the Spot Healing Brush; this removes blemishes as well as other imperfections quickly from your photos. You can either drag to smoothen imperfections in an area or click once on a blemish.
Guided Edits
With the Guided mode feature in Adobe Photoshop Elements, you can make basic choices and just sit back while the program performs the task for you. To use this feature, go to the Shortcuts Bar and click “Guided Edits”.
While in this mode, pick your desired image from the “Photo Bin”. After making this pick, you can start editing your image by selecting one out of the six categories listed directly below the Shortcuts Bar. The “Basics” category is for helping you make basic edits to your photo i.e. The “Sharpen”, “Contrast” and “Brightness” functions. The Color category helps you make adjustments to the color of your photo i.e. the “Remove a Color Cast”, the “Black & White”, and the “B&W Color Pop” functions.
The “Fun Edits” feature makes your photo interesting utilizing effects like the “Puzzle Effect” which converts a photo to a jigsaw puzzle. The “Photomerge” option helps you merge different images to make one new image, while the “Special Edits” choice adds some artistic effects to your work such as “Restore Old Photo” and the “Orton Effect”. At least four different functions are associated with each category which helps you in editing the desired image.
From the functions in the Guided Edit mode, you can make different choices from the available options. You will be guided all through the process to make the best changes for your desired photo.
There are instructions listed in the pane, just follow them to complete the editing process. Even without having professional photo editing skills, the Guided Edit mode will help you create great photos.
-
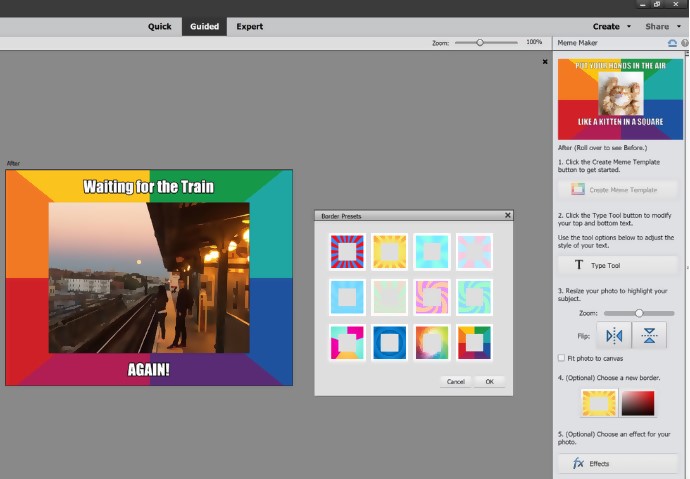
Text and Border Overlay Guided Edit
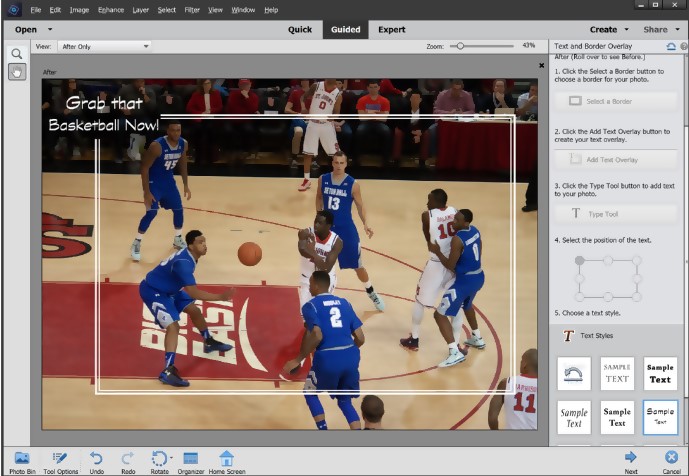
This is a Guided edit feature that helps you annotate a single photo. It makes ornamentation possible, without concealing the photo in any way. Though the border and text can be resized and given a different color, its position cannot be changed; it will remain aligned to the border.
From the different built-in styles, you can change the color of the border and text to your preferred color and use your preferred font to add text to the images or design.
However, you must be careful when selecting the default text because with Elements, the default lettering cannot be replaced and you cannot group select, instead, you must replace or remove at least a letter before the text can be group-replaced.
-
Painterly Pro Guided Edit
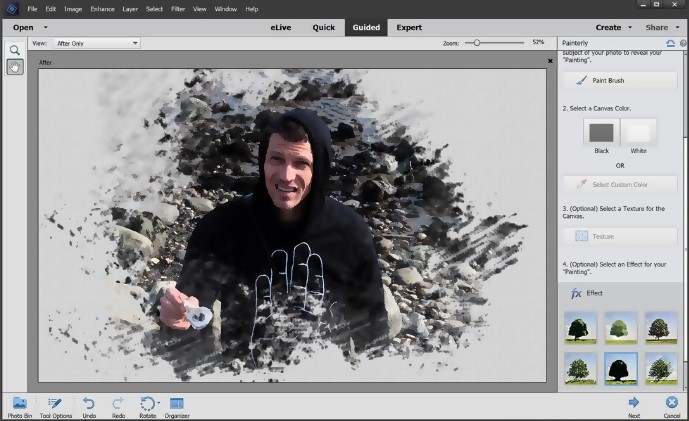
The Painterly Pro feature makes you look like an artist even though you’re far from being one. You don’t need to have any artistic skill. It uses your existing image for brush strokes. There are five brush styles, and when you apply any of them, you will be able to pick a background canvas texture as well as apply a painterly filer like watercolor (optional). With this feature, you can create a more appealing image than your normal snapshot.
-
Speed Pan Guided Edit
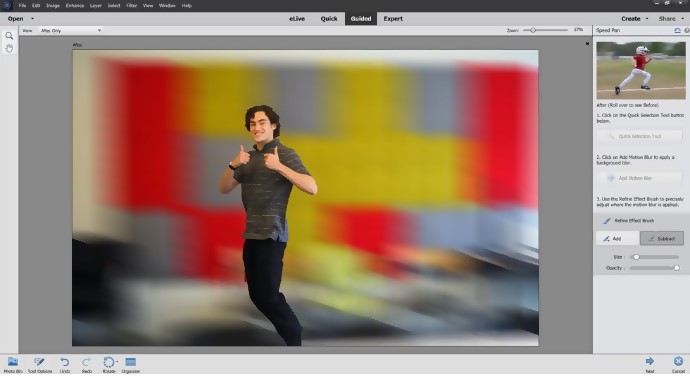
With this feature, you can create the motion blur that will be taken with your camera while tracking the subject. This Quick Selection tool can be used to quickly pick the subject that will be speeding; then click “Add Motion Blur” and pick the intensity and angle.
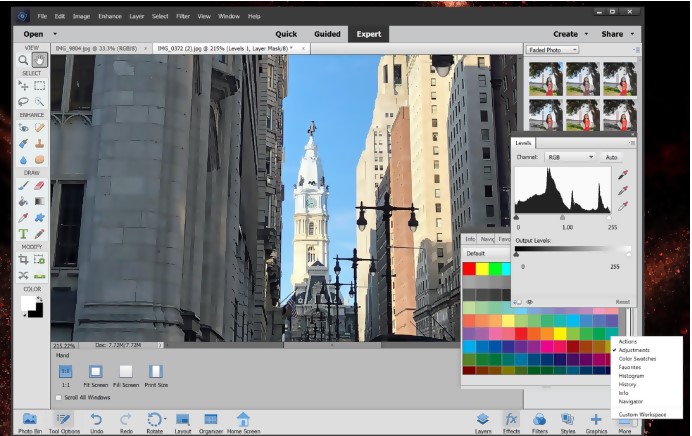
Advanced Tools
Many effects in Photoshop deals with picking objects precisely, and either removing them from or adding them to a photo. There’s an Auto Selection tool that helps you draw the shape of your choice over the object you wish to select, and then determines the edges of your object. As mentioned earlier, there’s a Quick Selection tool which makes you scribble on the photo you wish to select.
A Refine Edge option is usually offered by all the selection tools; this option makes use of a circle with outer and inner selection perimeters. This tool performs excellently, in that it switches between subtracting and adding from your selection, which depends on whether you are outside or inside the original selection. You can also have the Adobe Photoshop Elements filter the selection for you.
With the Photomerge Group Shot tool, you get the best possible expression from everyone in a group shot, while the Photomerge Panorama tool lets you have much control, creating a full panorama. It also fills up empty areas left out by your photos.
-
Exporting Your Work
Having completed a Project, you’ll be guided through the designing and printing process. However, if your work is kept in the digital world, Adobe Photoshop Elements can share your work on photo-sharing sites and social media.
Editor's verdict
Adobe Photoshop Elements provides you with everything required no matter your skill level. If you wish to add a little flair to your photos, there are lots of graphics, filters, adjustments, as well as different options to give your photo a unique look.
The whole process is very easy and if you so desire, the Adobe program walks you through each tech. Though expert editors will see the absence of more technical editing options from this Adobe program as a limitation, a large percentage of users will get all they need to transform their pictures into masterpieces.