If you are in need of software that provides you with everything you need for photo-editing. Luminar 3 is here to give you what you truly want. This article has got you covered; you need not to worry about how to get the necessary information you need about Luminar 3. With Luminar 3, you can create the look you want in just few seconds.
In this article, we would be discussing its pros, upgraded features, how to install and its cost. If you want to know this photo editing software to opt for, then this article is very ideal for you.
Navigation of Contents
Overview: Luminar 3 Review
Overtime, Luminar 3 has become one of the most prominent image editing programs for photographers. This program is available for both Mac and PC users.
It has got more than 300 powerful features and tools you would love to work with, these features include RAW support, masking, custom brush for editing, Luminar Looks, various photo filters, among others.
Luminar has got advanced controls which can be used easily. With the intelligent filters such as Accent AI 2.0, you can get nice looking images within a short moment.
The innovative interface cannot be overlooked, as this enables you to adjust/customize your style. Luminar 3 is highly personalized image software ideal for both amateur and professional photographers.
Throughout this review, we would be looking at the pros and cons, the new upgrades, the pricing and also if it is recommendable.
User Reviews
There are no reviews yet. Be the first one to write one.
**Official website: https://skylum.com/luminar
Pros And Cons Of Luminar 3
Pros:
- Cheaper than Lightroom
- Has a combination of Photoshop and Lightroom
- Available for Windows
- Smart use of Layers
- More than 60 presets
- Preview slider
- Local adjustments with gradients and brush
Cons:
- Some features produce inconsistent results
- Lacks asset management
- Only one image can be opened at a time
- Separate Batch processing
- Difficulty in using Clone stamping
- Lacks face recognition or keyword tagging
What I like Skylum Luminar 3
Using Luminar with Adobe Photoshop
After having a look into the nature of Luminar, Luminar is similar to Adobe Photoshop than it is to Adobe Lightroom, although Luminar combines both Adobe Photoshop and Lightroom.
With the user interface of Luminar, you can work on a single image at a time. Photoshop allows you add powerful adjustments and edits to your work.
Opening Images
With the Quick Edit command, you can easily work with single images that you cannot find in your Luminar Library.
When I wanted to edit an individual image, I made use of the Luminar’s Quick Edit function. The Quick Edit comes in handy especially when there is an image you want to process quickly.
When an image was opened in Quick Edit, I noticed it remained in its real location on my hard drive. You can click the Open Button Menu, File> Open images for Quick Edit or press Cmd+O (MacOs) or Ctrl=O (Windows).
Photos will always remain in your Quick Edit shortcut until they are removed. I discarded a photo from Quick Edit, by selecting the image first and then clicked on the Delete key to discard it from my Library. This process removes the photos from the library but ensures they are well kept in their real location.
You can also decide to keep a Quick Edit image in your Library; to do this you can just drag it to any folder in the panel of the library side.
Organising images
Luminar offers you a good Photo organization. Your library becomes more useful when you can easily find your favorite photos, it is therefore important you take your time to organize your photos.
The basic organization tools in Luminar are folders, which are directly connected to Folders on your hard drive. With the organization tool, I could also create an organization of my images using Albums. With Albums, I was able to organize my photos into various groups without having effect on their location in my hard drive.
Keeping and maintaining your photos is very important, a very good way to do this is organizing your photos within folders in Luminar. All organization applied to folders inside Luminar directly affects the way the folder on your hard drive is organized.
Nice and friendly interface
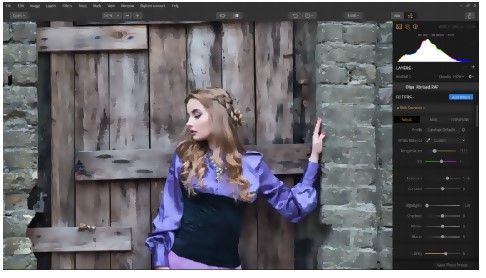
Luminar has got a clean-looking, clear, dark gray interface with modernized icons. . I noticed that the interface is configurable, this is really good. With the right panel, I could switch between Edit, Library and Info display.
Your images appear in tiled view at the main center area; there are also buttons for picking or rejecting, favoriting and color-coding along the bottom. I used the eye icon to switch the image display to the unedited version and also use another icon to see them in a split view.
I zoomed with the mouse, this is quite easy, and you can also zoom from buttons at the top of the program window.
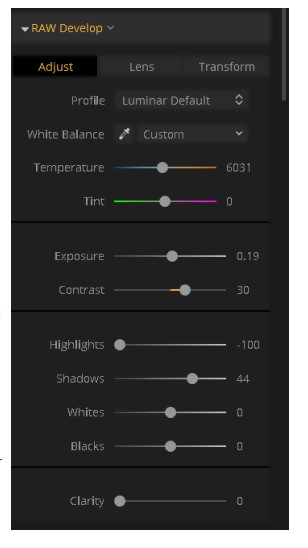
Developing a RAW photo
Luminar Default is the only raw-developing profiles Luminar has got. You can choose Adobe Standard, and also any profile it gets from your camera. I actually love the choices I got from Canon EOS 6D; the choices include Landscape, Portrait, Faithful, Neutral and Standard.
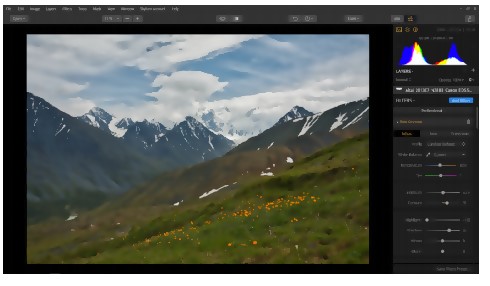
Photo Adjustment
You can switch the right panel into Edit mode, doing this brings up a customizable group of adjustments. The Quick and Awesome set of controls or filters pop up by default. Quick and Awesome consists AI Sky Enhancer, Accent AI Filter, Clarity, Saturation/Vibrance.
For any adjustments, I made use of a mask or brush; the mask can be radial, luminosity or gradient. You can also use the Dodge and Burn local adjustment brush for toning or brightening down specific areas.
I am really impressed with the Accent AI Filter; this is one of the best auto-enhancers. With the Boost slider, I was able to bring up dark shadows and brighten the highlights at once. I also used the AI Sky Enhancer to find sky in my photos.
In the default Quick & Awesome workspace, you add the basic exposure and contrast tools with the use of the Add Filters button. If you want to create and save your own custom workspaces, any individual adjustment group can be added or removed.
When I switched to the professional workspace, I got all the familiar tools I expected in a pro photo application: this include Highlights, Clarity, Whites, Contrast, Blacks, Exposures and Shadows. You can also get Curve editing, Denoise and Remove Color Cast.
With the inclusion of the Advanced Contrast, you can adjust contrast in shadows, midtones or highlights only. This is a very useful tool, if your image has large overall contrast.
Luminar has got good noise reduction tools that helps you smoothen those low-light images. The editing tools enable you to adjust the perspective of your image, with sliders for Rotate, Vertical, Scale, Aspect and Horizontal.
Sharing and Output
There are basic options for sending edited image to the world. With Luminar, you can print and can also share your images through email, but you cannot send via chat apps or social networks. I noticed that I could also export my work as JPG, TIFF, PSD, PDF or PNG, Lightroom has got fewer options.
Batch Processing
The Batch Processing selection provides you with a dialog box. I was able to make some decisions based on what you want your image to look like. Rather than processing images one-by-one, the idea here is to process multiple images.
You can export multiple images for JPEGs or email. Under the Presets tab, predesignated adjustments and filters can also be added to your images.
Batch processing allows you to change the color profile and format, and also rename them. This is only ideal for those who would like to apply a preset to multiple images at once. I realized that this batch editing process is time consuming, except you would have to re-import the images to edit one by one.
Filters
In Skylum Luminar, each filter has got its own tweakable settings specific to each area. Luminar has got some filters that are not present in any other photo editor.
I found some filters very interesting, this include Sun Rays filter AI Sky Enhancer, and AI Accent filter. These filters are really outstanding, there are much better to what we have in Photoshop or Lightroom.
The Sun Rays filter enables you to add bursts of light to your image, and this looks exactly like they came from the sun. You can easily change the intensity and the position of the light.
I also love the AI Sky Enhancer, with this filter; you can single out and get the sky adjusted. This is easier and quicker because you do not need to pull the photo out and put it in Photoshop for editing.
The AI Accent filter is an enhancement filter that functions as single-slider-edits- all feature. This filter helps to add a nice accent to your image but I prefer to make use of a brush to apply it.
I really do not like the fact that AI Accent filter has an effect on the whole image. However, this filter is a great magical HDR editing tool. All you need to do when using this filter is to apply it in moderation.
New Upgrades:
There are several new upgrades you would love to work within this latest version of Luminar. Luminar 3 utilizes artificial intelligence and also adapts to your editing style, it also offers robust professional tools for image editing.
With the new Luminar, you can erase unwanted strangers and objects; you can also remove any odd or excessive details. Luminar 3 allows you to fix skin imperfections quickly and also restore old images in just a few clicks.
The new upgrades include the following:
- Upgraded Library panel for editing and viewing multiple images
- New non-destructive workflow
- New Smart Shortcuts for arranging your images automatically
- Improved info panel
- All New Luminar Looks with AI
- Improved filter controls for windows
- Speed improvements
- Improved Sync adjustments command
Cost: (is it Cheap or expensive?)
Luminar 3 is not as expensive as Lightroom, it only goes for $67 with a discount. If you own a Skylum product already, you receive a further discount. With the Luminar 3, you get both versions of Lightroom and Photoshop. There is a 30-day trial download available at the menu in the main site.
Installation Guide
How to Download and Setup
Step 1: Visit https://skylum.com/support website and click the download button

Step 2: Put your Email Address for Signup, use Luminar 3 30 days trial

Step 3: After clicking download, save it at your preferred location
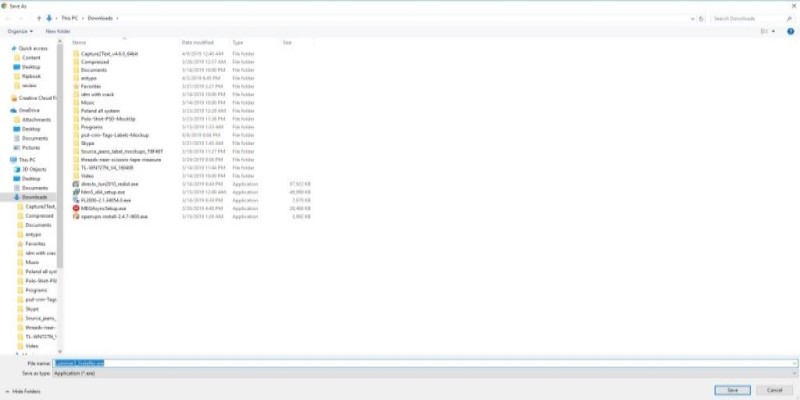
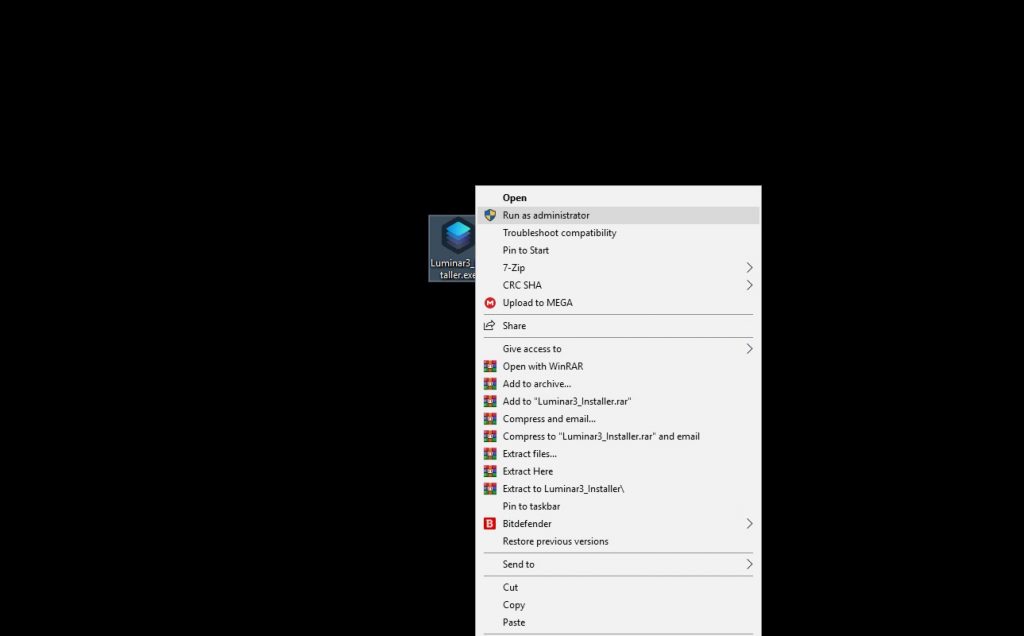
Step 4: Select the file and click Run as Administrator
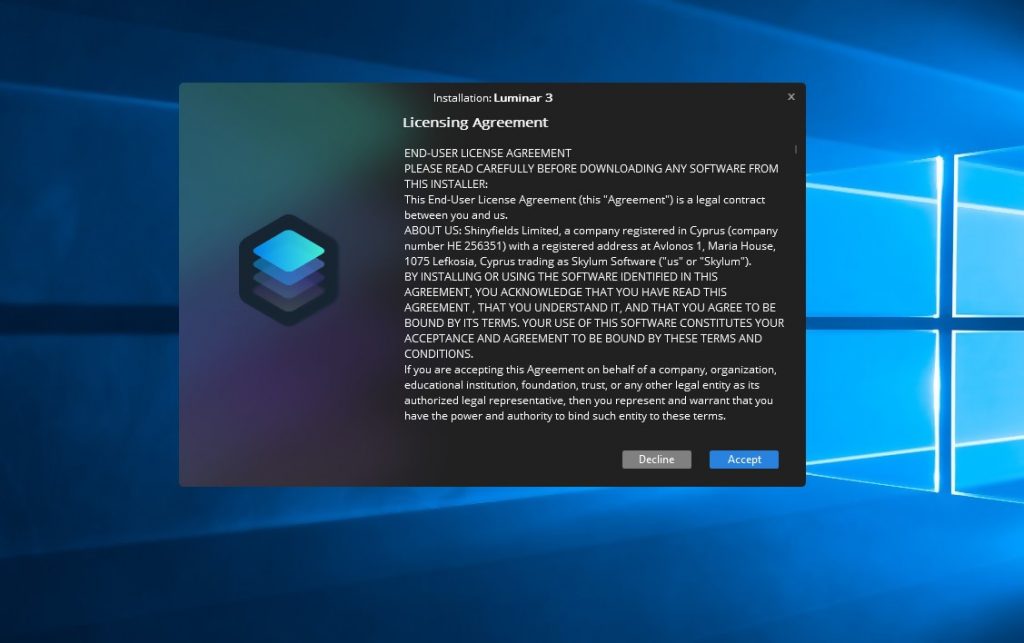
Step 5: Accept the licensing Agreement
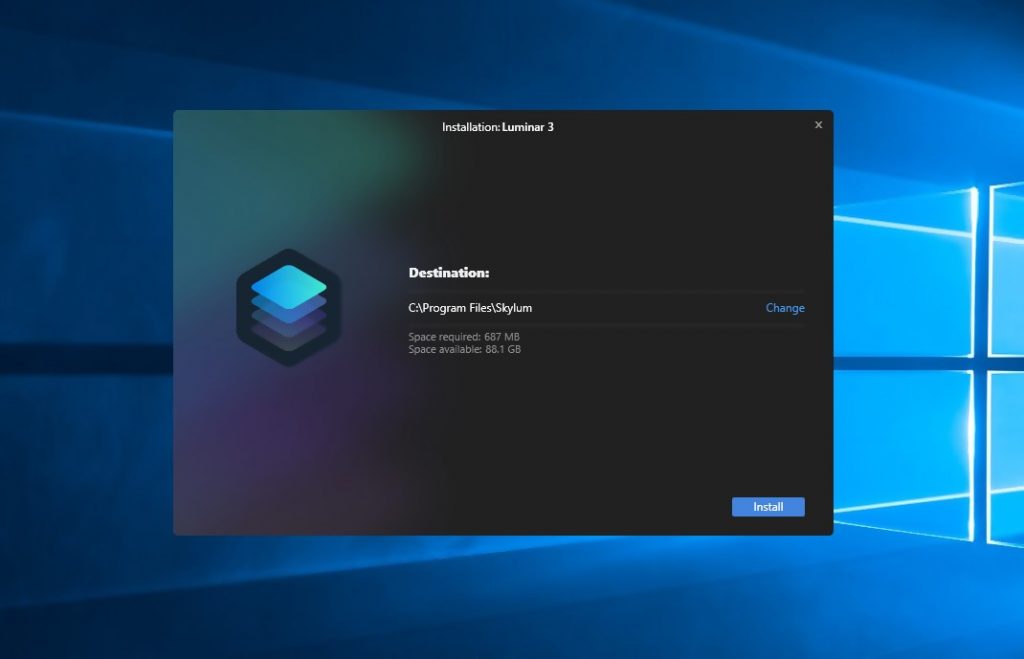
Step 6: Then click on Install
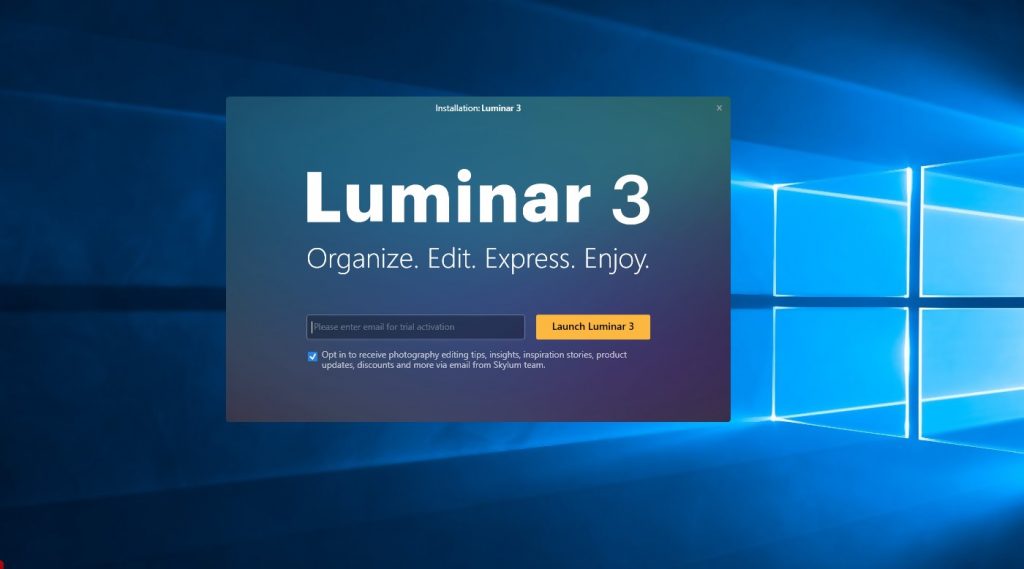
Step 7: Import your email Address for the active trial version and then click Launch Luminar 3
Do we recommend or not?
If you really love trying out new things on your images, then it is no doubt that Luminar 3 is the best option for you. Another reason I love this software is its cost, it is not as expensive as Lightroom, and it is very affordable.
This software has got impressive adjustment tools, effects, workflow, and interface. For Amateur and Professional photographers, Luminar has got you covered.
I would gladly recommend Luminar 3, this image editing software is an outstanding alternative for photographers who need abundant automation and very creative options for various photos.
This software has over fifty powerful tools you would never regret working with. With Luminar 3, you do not need to worry about how to get create the look you want.