Searching for an alternative to Lightroom to sort and save your favorite photos? Then, the ACDSee Photo Studio may be the right software to meet your creative needs, especially if you need to organize, develop, and export images without much effort.
However, our goal isn’t to know whether ACDSee can fulfill its processing promises but to see whether it measures up to competitors
User Reviews
There are no reviews yet. Be the first one to write one.
**Official website: https://www.acdsee.com/en/products/photo-studio-professional/
OVERVIEW: ACDSee Standard Vs. Professional Vs. Ultimate
Since the birth of ACD systems Inc back in 1993, they’ve been paying more attention to digital photography. They’ve worked diligently to develop apps to bring for amateur and professional photographs alike. ACDSee has created 4 different products for customers to pick from:
- Windows accessibility
- Mobile syncing
- Digital asset management
- Print capabilities
- Standard editing capabilities
- Windows accessibility
- Mobile syncing
- Digital asset management
- Print capabilities
- Standard editing capabilities
- Windows accessibility
- All ACDSee Professional features present
- Advanced manipulation/adjustment tools
- Layer editing
More detail about ACDSee Ultimate you can read Fixthephoto's acdsee review.
Pros and Cons of acdsee photo studio Professional
ACDSee Photo Studio Professional comes with different features to fulfill users’ needs. However, it also comes with a few issues. The following are the pros and cons of this software.
Pros
- Quick processing
- adjustment layers are very easy to use
- several filters and brushes to choose from
- Very affordable and accessible
- Nondestructive retouching brushes
- Video features can set your memories in motion
- Great skin-improvement tools
Cons
- It can take some time to switch between the Developer and Editor modules
- Its interface is not well polished
- The cloud service requires extra cost
What I like Acdsee Photo Studio Professional:
Great Layout and Features
Five major modes can be found in ACDSee, with each function having separate tabs: Edit, View, Photos, Develop and Manage. There are other features, but the five mentioned above are the ones used generally. Below is a summary of these features:
- The Edit mode is where you perform advanced editing with layers.
- The View mode lets you view a single picture in full-screen mode; it has some editing functions included as well.
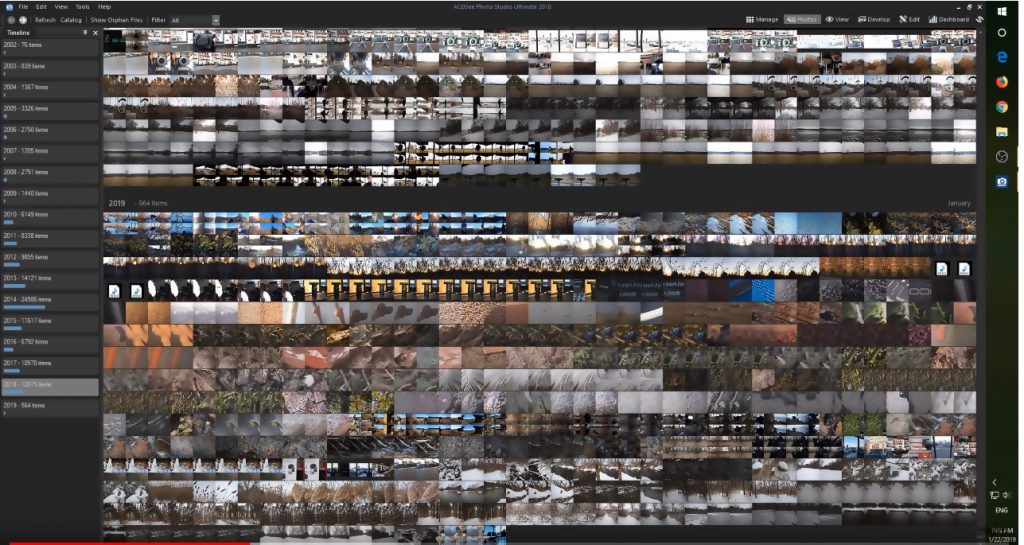
- Photos create a better way of viewing images on your hard drive. You can also check through pictures from a specific year, month, or day.
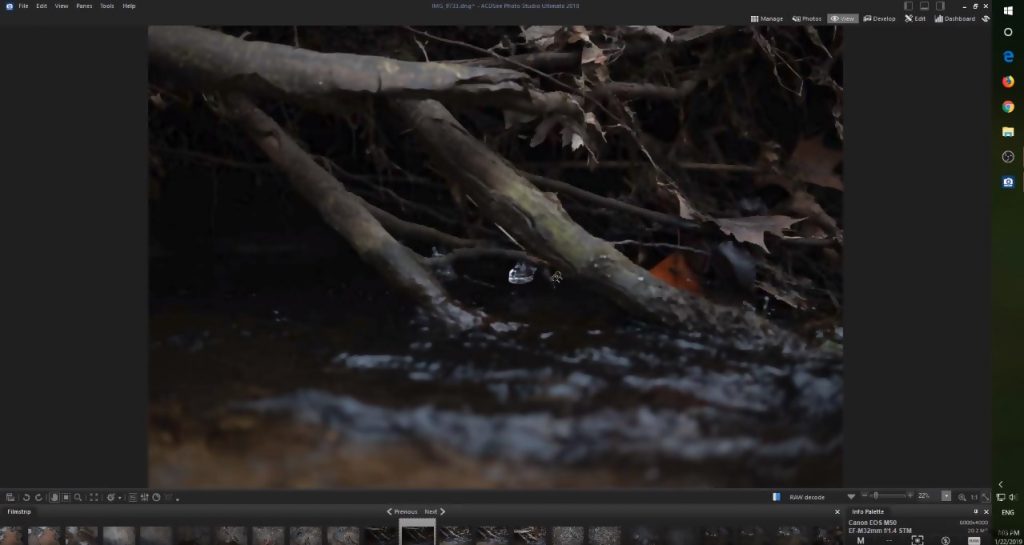
- The Develop mode helps you edit RAW image files.
- Manage mode can access your computer and locate where images are stored. Viewing your images in the thumbnail view is the default option. For any image, it shows histogram, EXIF data, and shot information.
Other tabs available include the Messages tab, the Dashboard tab, and the 365 tab. The 365 tab gives you access to your subscription information if you want to. On the Dashboard tab, you get graphical data on camera/image information- your most frequently used ISO setting, number, and type of files.
Friendly Workplace

I believe the ACDSee Photo Studio workplace is friendlier compared to that of DxO PhotoLab or Capture One Pro. However, it seems Lightroom CC is simpler because it has fewer tools.
The ACDSee application utilizes the three-panel view (the standard), with the right-side panel occupied by the tools and properties, the middle section occupied by the viewing area, while the left-side houses the image-source folders.
You can pick any of the three interface colors: charcoal, silver, and light. ACDSee Photo Studio Professional unlike Capture One and DxO PhotoLab makes use of a modal interface. These tabs are found across the top of the application window and the interface is changed based on whatever you’re doing i.e. editing, organizing, exporting, etc. The ACDSee application has a flexible interface, which allows you to auto-hide and undock panels if you want to.
For mode switching, I prefer the clear icon design to CyberLink PhotoDirector’s basic text buttons. With the 365 buttons right beside the mode buttons, you can upload photos to the software’s cloud storage. Just like PhotoDirector and Lightroom, ACDSee Photo Studio also allows you to customize the modes that will show in the interface.
The ACDSee Photo Studio groups all photos by date, and shows each one of them in its database. It offers touch support; however, the responses were weak and cannot be strongly relied upon. Concerning this, the touch support of Lightroom Classic is better.
Easy Import of Files
As expected, importing takes place in the Manage mode. You may decide to change the name of the files on import and to add metadata, like keywords. However, you cannot apply adjustment presets and generally, the import is not as robust compared to that offered by PhotoDirector and Lightroom. The ACDSee Photo Studio Professional, unlike Lightroom, doesn’t need you to import files, you only need to open a photo file anywhere and then it will be included in the database of the app.
You can open photos, music, and videos through ACDSee Professional, but I would have preferred the app to display just photos in Manage view. It is easier to see your last import with Lightroom. ACDSee Professional supports the raw camera formats from well-known professional and prosumer models. For new cameras, the support updates regularly, though compared to some competitors, these updates are slower. For instance, it doesn’t support the Canon EOS R.
Another issue is its raw file conversion or import quality. After testing with several images, ACDSee though performed well in converting raw camera files, both Capture One and Lightroom still performed better, with the latter revealing more natural lighting and color with well-exposed images, and the former revealing the most detail. However, results vary for different camera model.
Organization options available include color-labels, ratings, captions, and categories. The assistance you get to enter keywords isn’t as much compared to that which you get from Lightroom; just like you’re on your own. Also, you can categorize photos into Collections and Smart Collections.
Special Zooming & Editing Tools:
The Edit mode of the ACDSee Photo Studio is where you find tools like watermarking, retouching, and text overly. Down the left panel is a long list of tools. Under “Edit” you’ll find some development tools, but I’ll have preferred a design that keeps tools where they should be, giving a friendlier look to the Edit function.
This model has a new feature – the Smart Erase tool, which can be compared to the Content-Aware Fill tool of Photoshop that removes unwanted objects automatically from a picture.
The Dehaze tool performed well but seems to jack up the contrast more than it should. What differentiates it from the Adobe tool is that you are opportune to add very realistic haze. With the automatic corrections of DxO PhotoLab, it performs best in removing haze out of the box, and as the ACDSee and Adobe do, it does not introduce a color cast.
Portrait photographers make use of the Skin Tune tool. This set contains three tools: Glow, Smoothing, and Radius. One thing I’ll love to be included in this tool is a Before-and-After view.
The Edit mode has the Noise removal function and it smoothens out noise properly, however you need to eyeball it since there’s no Auto option. However, there is a very interesting View option that shows only the noise in grayscale. The updated version of the Black & White conversion tool is great, having rightness sliders for eight different colors. However, for the B&W conversion, I would love to see presets.
The artistic special effects are 22 in number, including Orton, Grunge, and Stained Glass. These effects are Photoshop-like and are fun to work with, but Al filters that intelligently apply Van Gogh, as well as other artists’ styles, are absent. Furthermore, your edits can be recorded as Actions, or you can utilize prefab Actions that apply fade, film styles, grain and more. The program also supports plug-ins.
Sharing and Output
For sharing, the 365 mode of the ACDSee Photo Studio is the starting point. This mode fixes a web browser into the app where you can sign into a cloud account. After logging in, you can then upload photos through the transfer sub-mode.
As per the Publish Services view of the Lightroom Classic, online photos will be seen on the top of a split gallery thumbnail view while the local ones will be placed in the bottom. You can then drag images to the SeeDrive (the online storage of ACDSee).
By default, you can upload JPGs to 365, but you can also pick raw files with associated data. Local folders can synchronize with the online storage, but this is only possible when you tap the Sync to Web button. The application doesn’t link to your gallery; the only sharing options available are Twitter, email and web widget.
You will be able to view all your synced pictures at www.365.acdsee.com and if you permit it, the public will be able to view them as well. The dark, attractive image pages show tags and permits download and comments. There on the popular page, we have some appealing photos, but if you’re searching for social photography experience, it’s difficult to beat Flickr. Although Instagram is well known, it is more of social networking than photography, and things like full-size viewing and EXIF are not available.
Whatever the case is, I’ll love to see the ACDSee Photo Studio Professional put in more efforts into adding better tools for sending message directly to Facebook, SmugMug, and Flickr instead of creating its personal web galleries. Although there are options that allow you to send pictures to email as well as other services, they aren’t as effective as the equivalents of Lightroom Classic.
In terms of old-school output option, a full set of tools are offered by the ACDSee Photo Studio Professional, which includes different layouts. It supports the EXIF 2.2 printing standard and allows you to choose if you want the printer or the program to handle color management.
COST (is it cheap or expensive?)
ACDSee Photo Studio won’t cost you much; its regular price is $159.98 and has a limited offer of $64.95. The upgrading pricing starts at $59.99 with a 30-day money-back guarantee. ACDSee also provides you with the free 30-day trial package.
NEW UPGRADES
Going Mobile with the ACDSee Photo Studio
In different ways, the job of an average photographer is made easier via technology. However, the coordination of images between computers, phones, and cameras is a chore.
ACDSee decided to come up with a solution to ensure the process goes smoothly. With the ACDSee Mobile Sync app, your mobile content can be integrated into an existing database.
This app is available for both Apple and Android products. This means that with your smart devices, transferring images in an instant is possible. The app takes into consideration all the images transferred to an ACDSee database by the user.
ACDSee Photo Studio Software Guide
The ACDSee Photo Studio Software guides both beginners and photo veterans. For any question, they host a community space which is open to all users. Interactive workshops, chat widgets, and forums provide platforms for those with questions.
ACDSee knows well that becoming comfortable and exploring the software doesn’t just happen all of a sudden. For this reason, they’ve provided various resources to show users how much is offered by their product.
There are various instructions and video tutorials on how to access and utilize these tools. This is great for customers because they will no longer miss out on features they know nothing about. All you need to do is log onto YouTube and press play.
INSTALLATION GUIDE
Steps to Download and Set up the ACDSee Photo Studio
Step 1: Visit https://www.acdsee.com, to download the software.
Step 2: After downloading the software double click it to start setup

Step 3: Click next

Step 4: Next, click “I accept the terms in the license agreement” and then click “Next”

Step 5: Click Complete & Next

Step 6: Click Install

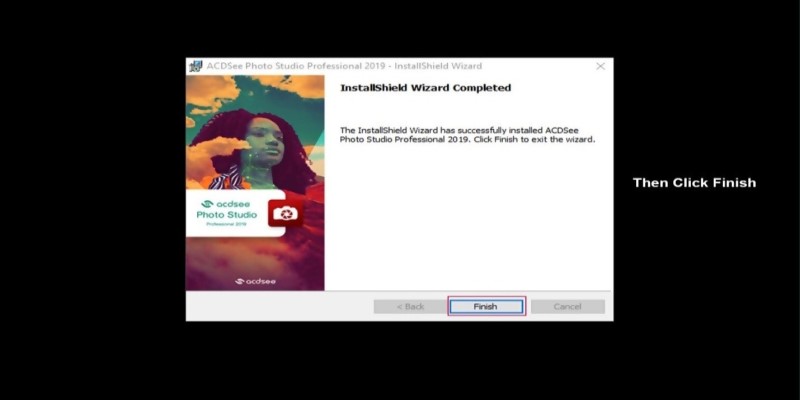
Step 7: Click “Finish”
DO WE RECOMMEND?
ACDSee Photo Studio is a great photo editor and organizer, but the company doesn’t stop there; they keep including worthy tools to its editing-tool collection. However, I don’t think this model requires a subscription model. Despite its improvements, the ACDSee Photo Studio still stands behind Adobe Lightroom Classic in terms of image-correction tools and interface design.